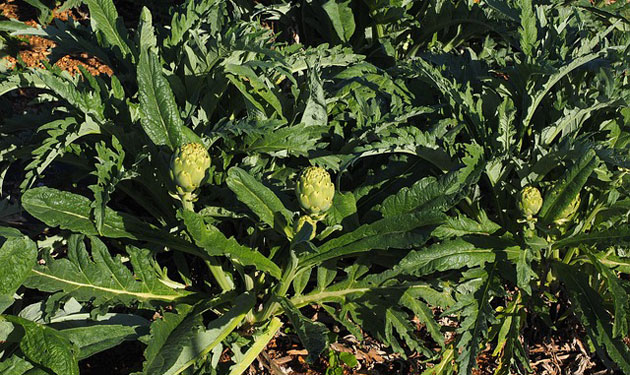
Growing vegetables can be one of the most delightful hobbies one can take up. An unusual mouth-watering vegetable to try cultivating is the artichoke (Cynara cardunculus var. scolymus). It is tough on the outside, looking like it has thick and green leaves, but is actually very tasty and nutritious. In this guide you will learn the steps on how to grow artichoke at home, beginning with choosing a seed, all the way to harvesting the delicious buds.
What is an Artichoke?
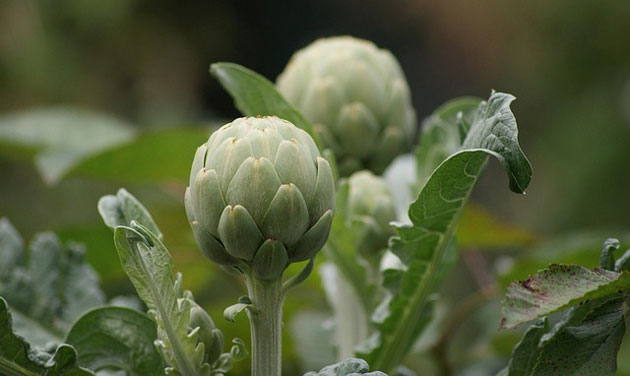
The artichoke is a flower bud of a plant in the thistle family. Unlike most flowers, we do not eat it whole. The whole is divided into parts which can be consumed separately. The outer parts guarding the inner heart of the flower can be devoured along with the soft innermost parts.
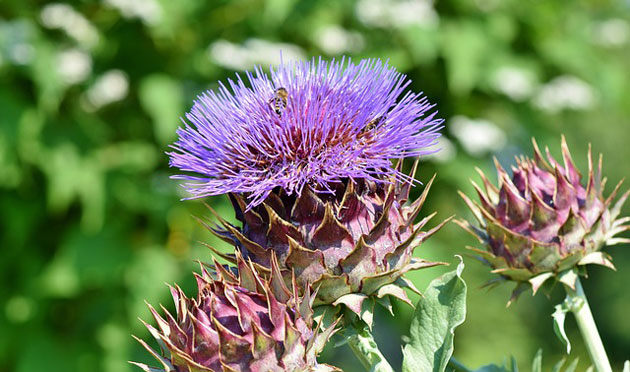
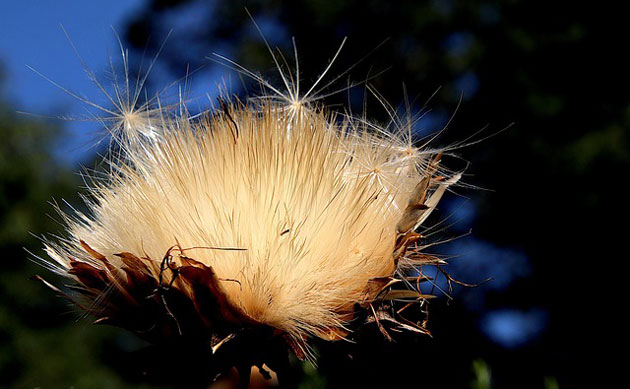
When you do not consume the bud promptly and allow it to stay on the plant for longer, it matures into a large purple flower. Surprisingly, this flower unlike others is not edible, but still looks beautiful.
High in vitamins, fiber, and antioxidants, artichokes can be steamed, served with sauce or butter, or used in dips and salads. The best part is, that they’re even tastier when homegrown.
When to Plant Artichokes
First thing that u should know is when to plant artichoke. These plants take so long to mature, if ever right timing is critical.
- In a mild climate (think Central California or Mediterranean-like) artichokes can be planted in the fall or even (gasp) winter.
- In a colder climate, you want to start the seeds indoors 8–10 weeks before your last frost of spring.
At first, cool weather is good for artichokes but they need sun as they grow. Growing season should be 150 to 180 days, the earlier they are planted the merrier, in order to allow for harvesting before the buds over-mature.
What You’ll Need to Grow Artichokes
So prior to planting, collect these basic elements:
- Artichoke seeds or slips (called crowns or seedlings)
- Seed trays or small cell packs (for where you will be starting them indoors)
- Large pots or garden bed
- Soil or potting mix enriched with lots
- Compost/ organic fertilizers
- The sun is your friend (artichokes need at least 6 hrs of sun each day though)
- A watering can or hose for occasional watering
- To retain moisture inside the soil, mulch or straw
Make sure the pot you grow them in is a good 18 inches across and deep. Artichoke needs wide spaces.
Step-by-Step Guide to Growing Artichokes
Here is how to grow artichoke in simple steps.
Step 1: Pick Your Artichoke Variety
Artichokes are a variety of plants, and some flourish better in various habitats:
- Green Globe — The typical type of artichoke and does well in warmer climates.
- Imperial Star: Pertinent variety that thrives even on mild weather.
- Violetto: A really lovely glossy purple variety that is both scrumptious and pretty.
For your first artichoke experiment, we suggest Imperial Star if you are growing where the summers are short.
Step 2: Start Indoors if Needed
If you have a cold climate or expecting new frosts, you will need to start your indoor plants from seed:
- Put the seed trays or small pots in a pot filled with compost.
- Sow seeds ¼ inch deep in the soil and about 3-4 inches apart.
- Put them in a warm place (65-75°F/18.3-24°C).
- Water gently, barely moistening the soil.
- These seedlings are at 2–3 weeks old when ready to plant outside at the seedling stage.
By planting your seeds indoors, you will get a massive jump-start for when they immediately need to deal with outdoor conditions. Keep in mind, artichokes are rather slow developers, taking up to 4 months to produce blooms, which is when they produce those buds, and often they need a couple of years to flower.
To force them to later flower during their first year, you can try a step called vernalization, which is to expose the seedlings to prolonged temperatures below 50°F/10°C for about 10 days before transplanting them to their outdoor beds. Late winter or early spring is the ideal time to start them from seed indoors, about two months before the outdoors weather is ready.
Step 3: Prepare the Soil
Artichokes appreciate full, rich, well-drained soil. Give your seedlings the best start by tilling the soil well:
- Shovel or garden fork to loosen the soil.
- Incorporate organic compost/aged manure.
- Add a little bit of balanced fertilizer or vegetable garden mix.
- Make sure the planting area drains well — Artichokes do not like to stand in water.
If you are going to plant them in containers, look for a premium potting mix or mix in some compost with the soil.
Step 4: Plant Seedlings/transplant crowns
If your seedlings are big enough, or if you are using crowns (roots to start with) you can then put them out.
- Make a hole at depth to fit the roots.
- Stem and crowns in the hole.
- Cover with soil and firm it up.
- Water the plant thoroughly after planting.
Spacing matters. You do not want the artichoke to grow into a giant plant, so give each plant about 3-4 feet spacing.
Step 5: Watering and Feeding
Artichokes need to be watered regularly, especially when they’re young.
- Water deeply 2–3 times a week, depending on the weather.
- The soil should have a balance of moisture without extremes.
- Mulching with straw/leaves helps to lock in moisture and prevent weeds.
- You should also feed them once every few weeks using an organic fertilizer.
Step 6: Dealing with Pests and Problems
Artichokes are no different than any other garden plant in that they can be visited by pests. Listed below are some things to do:
- Aphids – They are small bugs that sit on leaf surfaces. Wash them, water them or use an insecticidal soap.
- Snails and Slugs – These come out at night. Use slug traps or pick them by hand.
- Root Rot – If the soil is too wet, that is how it gets. Be sure the soil drains properly.
Inspect your plant frequently, and address immediately if they show indication of any harm.
Step 7: Harvesting Your Artichokes
About 5 to 6 months later, your plant should start popping out buds. Here is the how-to of when are they are ready to be harvested:
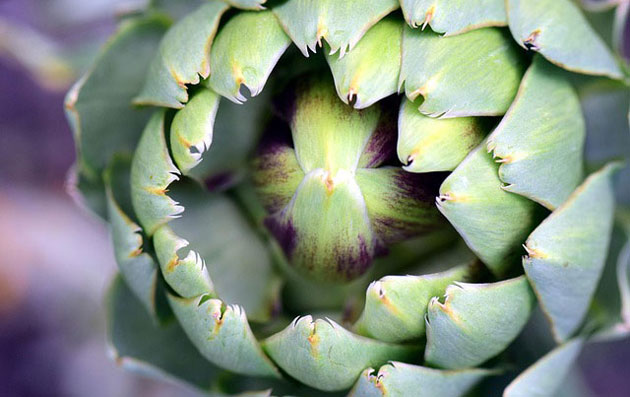
- Buds — tightly compact and firm, but before they develop into a flower.
- If the artichoke starts to open up, it is overripe.
- Cut the bud with garden shears, stripping about 2–3 inches (5.1–7.6 cm) of stem.
- New buds may come after the first harvest on side shoots. Look out once every few days.
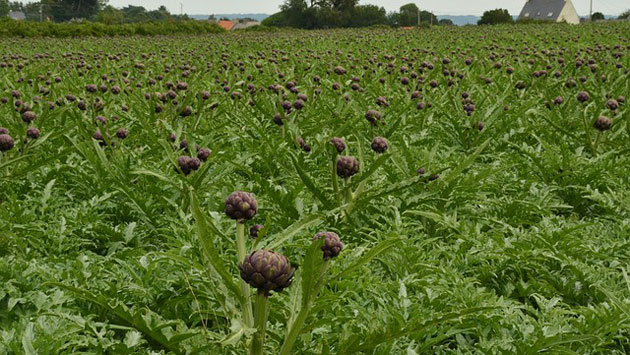
Plants will yield up to 6–12 artichokes (sometimes more in their second year).

Step 8: End of Season Care
As soon as the growing season winds down, you still have not finished! Bear in mind, artichokes are perennial plants, but in cold climates, they can be grown as annuals:
- After harvest in midyear, prune the plant to its roots, and mulch the base with 5-7 inches of mulch. This puts the plant into dormancy.
- In fall, the artichoke root crown will develop new shoots which you can replant elsewhere.
Pro Tips for Growing Better Artichokes
Some pro tips to remember:
- Sun—always for artichokes, since they are stubborn walled southerners!
- Water the soil, but not so much.
- Trim off the bottom leaves of your plant to encourage air flow.
- Rotate the location with every year, if possible.
- You can even plant artichoke as an ornamental — they look nice by themselves.
Final Thoughts
Plenty of homegrown artichokes are easy to grow; it takes patience but the return is worth it. Artichokes are a wonderful plant to grow even if you are not familiar with growing vegetables. Take the precautions, do the things as mentioned, and have fun with your plant to grow and blossom!


